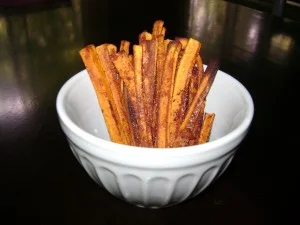
“Pumpkin” Fries
My new not-so-guilty pleasure! I absolutely love the flavor of these and so do my charges. These “pumpkin” fries are a great alternative to sugary snacks and a better option than a potato-based fry, making them a truly perfect fall treat. In addition to these tasty bites, I also enjoy making these butternut squash fries swapping in avocado oil and seasoning them with salt, pepper, and garlic powder for an equally delicious experience that can accompany any burger or sandwich. I can't wait to see all of the creative flavor combinations nannies come up with in the comments section. Enjoy!
Ingredients
- 1/2 butternut squash, peeled (I like to use the top half as it makes nicer looking fries)
- 2 tablespoon extra virgin coconut oil
- 4 teaspoons cinnamon
- 1 3/4 teaspoons ginger
- /2 teaspoon nutmeg
- A pinch of salt
- Maple sugar or honey
Directions
- Preheat oven to 450 degrees and line a cookie sheet with parchment paper or tin foil.
- Cut butternut squash into long thin slices.
- Toss squash fries in a large bowl with coconut oil and spread onto lined cookie sheet in a single layer. Try to make sure none of the fries are touching. You will most likely need to do two batches.
- Combine cinnamon, ginger, nutmeg, and salt in a small bowl. Sprinkle some of the spice mixture evenly over the fries. I like mine super seasoned!
- Bake in oven for approximately 15-18 minutes or until the bottoms of the fries are golden brown.
- Flip fries and sprinkle with remaining spice mixture. Cook for an additional 5-10 minutes until fries are evenly cooked and slightly crispy.
- Remove from oven. Sprinkle the fries with maple sugar or lightly drizzle with honey while the fries are still warm.
- Repeat with second batch if necessary.
- Serve and enjoy!
*Cooking times for me have varied significantly, especially when using a toaster oven, which tends to cook the fries more quickly. Also, the more uniform in size your fries are, the more evenly they will cook. Please consider checking on the fries more often the first time through this recipe so you don't end up with a bunch of burnt ones!

